Tuesday, October 22, 2013

One of the other more practical uses for the tiles...

One of the more practical uses for the digital tiles was for those who do landscape design, and don't have a ton of money to spend on mapping or landscape design software.


A quick run through this evening showed me a couple things:

  • First, it is both exhilarating and spooky in a stalker kind of way that when you change the orientation on a Google map, you will actually get 4 different views of property
  • Second, I need to do a lot of work on the poor man's flagstone (i.e. broken concrete pieces) tile set
  • Third, I need to get my butt moving on creating stack wall sets. 
Aside from those things, I am relatively happy with how easy it was to reconstruct the property, albeit the front yard is too close to the house. Looking forward to doing a redo on this this coming week. Looking to develop the tiles mentioned above, as well as carpet juniper tiles and a few other odds n end tiles.


Experimenting with Tiled

Well, after making quite a few tilesets, making maps has been more fun than ever. This past week, I decided to use the rock tiles to create the first set of cave settings. Unfortunately, although I can use shadowing tiles wonderfully in Tiled, creating lighting tiles is not as productive.


In the first picture, just a quick mock up of a cave network. Placing torches on the wall certainly gives the players an idea of where the light is, however it is just not that defined.


Taken into Photoshop and using the burn tool, several areas are targeted to suggest a difference in lighting in areas inside the cave network. Trying to figure out how to translate this into Tiled this week. 

So far, the results have not been good... wish me luck.


UPDATE: So, here is an updated version of the cave network mock up, using 'light' tiles on their own layer in Tiled. Because the tile editor allows for transparency/opacity, I took down the light layer to approximately 65%. Initially the light tile was create in the scale similar to the map: 64px x 64px. The first trial produced less than stellar results. By taking the tiles and saving in a 128x128 scale, allowing for greater curvature in the lit area - or the light circumference, it does let the viewer know the approximate distance that the light source is giving off and differentiating those areas to not lit ones.


Thursday, October 3, 2013

More and more tiles

Many more photos taken today to use as reference and starting points for more tiles. This weekend's endeavor: making stone/water border tiles, water tile, and mountain rock tiles...and maybe an addition on the shadow tiles or two...


Thursday, September 19, 2013

Tiles update

Wow...over 600 different tiles and counting. Can't wait to get the new sets up on the web. They've been set up to a 64x64 or 128x128 gaming grid size, well mostly the 128's and one heck of a learning experience. Just when I think I'm going to cheat or stop short, a quick opening old files of the first few maps using the first few tiles, really helps to keep pushing for better tiles.

This evening, I took a break from making individual tiles and used a mapping program called Tiled. It is quickly gaining favor here due to the layering ability and ability to add object layers to break the 'soldiering' of tiles. Kudos to the creator of Tiled, if you haven't looked it up, here is a link: http://www.mapeditor.org/

And here is a shot of a quick map made this evening of digital tiles for dirtpaths, shadows, trees, perennials and meadowlands at 25%


And zooming in to 100%, you can really start naming off the various plant life. I love detail. Looks like there is a tile or two that still doesn't blend properly, but again, that is fun part of making test maps. I can print out tilesheets, and fix those identified. Otherwise, things are coming along phenomenally! The many many many hours spent traversing through paddy laden cow pastures, tick infested woods and along sun scorched roads to photograph plant life, then hours of creating digital trees from single branches and photographs and finally seeing it in map form...it's been most definitely worth it. 


Cheers for now!


Thursday, August 8, 2013

Tiles, tiles and more tiles on the way

Having fun exploring the world of digital tiles again, this time with much more fervor and gusto! Actually, it is probably due to the fact that as one makes more and more tiles, the wrapping and understanding of how they lay out becomes much easier.


This is a quick shot from a few weeks ago. I've now made over several hundred tiles and they are being organized into better groups. Scale is based on the 64x64 and 128x128 tile size. To test how they wrap, I am using Tiled, an open source mapping program that allows regular soldiered tile layers and object layers that can be placed off the grid. Love it! Creating a source of tilesheets that can be used by a variety of individuals: rpg-ers, writers, artists, gamers, landscapers, etc. Quite exciting!

Wednesday, March 13, 2013

Sculpting in Springtime

Now that spring is here, I've had the chance to begin preparing to do some sculpture work outside. First up was this little fellow:
 

Ok, not so little, the disembodied forearm and hand stand approximately 24" tall. Looking to combine the 3D modeling principals with wire mesh for some fun ferroconcrete sculptures this year.


Thursday, January 31, 2013

Rigging Dummies by a Dummy

Oh goodness, rigging is certainly one o those little subtle nuances that takes time, patience, and LOTS of practice. There are so many minute details that, if you leave out one, it can throw a multitude of others off as well.

Of course, this little 'curse' (which is what I find I often do during this process) also becomes a blessing. As you are forced to go back, re do and undo and re do again, you begin to pick up a lot more tricks along the way. I hope to have a small animation soon.

Sunday, January 20, 2013

Little Bit of Digital Sculpting

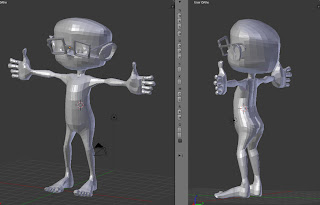
Having made the resin pour recently, I also wanted to create Olaf digitally using a program called Blender. Blender's a great program that is also open source; and for someone with a limited income, such as myself, this is a great opportunity to learn digital modeling without tearing apart the pocket book. There are numerous videos on each step of the process throughout the web. Some of the best ones I found through: CG Tuts+ and Blender Cookie


Modeling the character was pretty simple to do once I got the hang of the shortkeys. There are still some rough edges to work out, but since he is a pretty simple character and since I am just looking to use this for reference, for the moment this is fine.

A close-up of Olaf. Love the glasses!


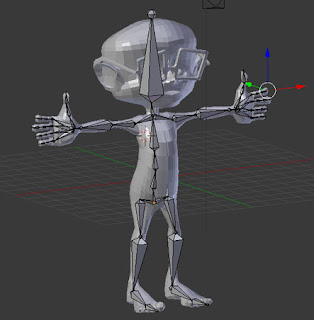
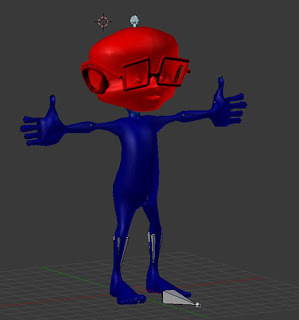
The rigging is in and finishing up on some weight painting. Looking forward to posing this fellow, as well as adding clothing, hair, and textures [although I hear that takes a lot of patience].


Sunday, January 13, 2013

Window of Time

As part of the list suggestions from the Facebook post, someone asked me to do a window of time as seen by a child...or how a child may imagine this expression.  To me, it suggests a sense of urgency as well as a little bit of self doubt. It is as though not only do you have that small window of opportunity to get something done, but all eyes are watching you.

Trying not to get locked in too much with one style, this piece is obviously much more graphic design oriented. Simple lines, quick repeated loops and choppy lettering add to this piece.

Total practice 'sketch' time: 15 minutes.


Friday, January 11, 2013

This is what happens...

Yesterday was one of those days - you know the ones. You are ready to draw and sketch away. Pencils and eraser at the ready, with a nice black pen nearby to capture some strong lines...and then...nothing.  Loops, swoops, swirls and straight lines...nothing inspires.

As much as Facebook has taken a big hit on the favorites for social media lately, it still holds tried and true for one thing: ask for suggestions on sketching and get a slew of answers, from the ridiculous to the most spiritually themed.  This one was the the first suggestion someone had: "recreate American Gothic as if inspired by Tim Burton."

So, "American Goric" by me, as inspired by Tim Burton: Total time, approximately 30 minutes - for fun.


Thank you Kathy for the kickstart!

Friday, January 4, 2013

Work in Progress - Halcyon, Florida and Steampunk!

Working on a piece for a friend and her daughter in the theme of Steampunk.  Having not done this type of theme too much prior, this has been FUN!

Starting with their picture:
Taken into photoshop and slanted the perspective a bit. I also changed the daughters head position in the next sketch:


Still working, using the line art as an initial guide and now going in to create lines without creating lines. Still a bit to go, but it has come quite a ways so far:


Their mock company, Bomb Bay Tea Company, is a mock venture for the whole family. An earlier piece was done for her husband, David, and their son Max: